Creating an Autoclicker
One of the most popular requests we get with the X1 Control Panel is how to create an autoclicker macro, as shown in this video.

You can also find a guide to this configuration on our YouTube channel here
This is a brief guide on how to set that up for yourself.
To start, you need to change your X1 control panel to "Expert mode" using the button on the bottom left
This can be changed back after finishing the macro by clicking the "Simple mode" button in the same place afterwards.
First, select the button that you would like to trigger the autoclicker.
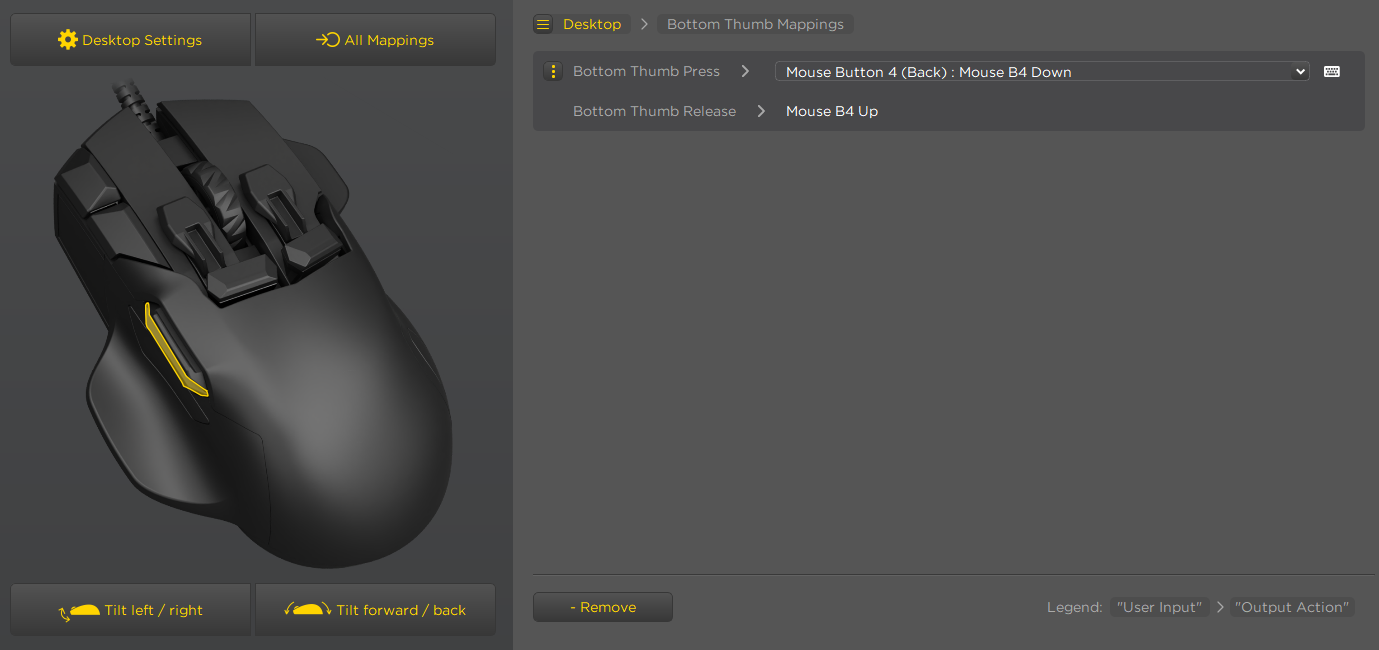
First, select the button that you would like to trigger the autoclicker.
In this image, I've selected Button 5, or what is typically the "Back" button by default
Remove any output that has been set to this button, and select "Mouse", then assign it to tap left click.
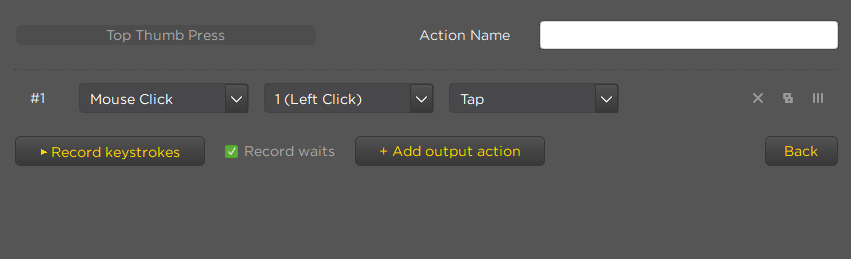
Outputs can be deleted by simply clicking the "x" next to them.
Next, select "Add output action", then select "Repeat / Wait / Stop / Alternate"
Outputs can be deleted by simply clicking the "x" next to them.
Next, select "Add output action", then select "Repeat / Wait / Stop / Alternate"
Now select "Repeat from", Order ID# "1", and how many clicks you want the autoclicker to repeat before stopping.
 If you select "0", the autoclicker will repeat infinitely with no way to stop it. You need to assign a release key in the next step.
"Repeat from" can be used to repeat any previous keystroke or mouse entry, or even text inputs. "Output ID#" selects which output to relate, and "Times" is how many times that macro will be repeated.
Assigning a release key allows the macro to be stopped, either when this key is pressed or when a key is no longer being held down.

This assignment means that any ongoing macros, such as an autoclicker, will be stopped when the button is no longer being held down.
After completing the steps above, this should be the result:
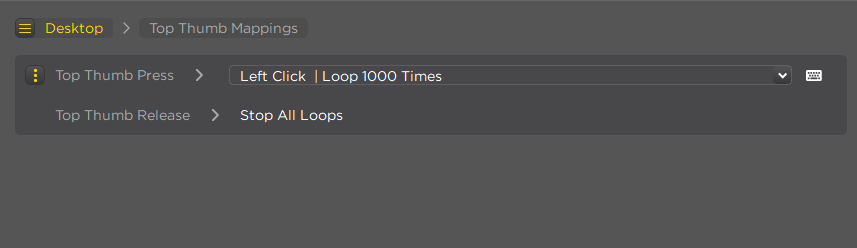
Assigning a release key allows the macro to be stopped, either when this key is pressed or when a key is no longer being held down.
This assignment means that any ongoing macros, such as an autoclicker, will be stopped when the button is no longer being held down.
After completing the steps above, this should be the result: